Showing posts with label holiday. Show all posts

Cocktails and Confetti

Happy New Year!!  After moving from the beach (and chased away by Sandy) we are all settled into our new place.  We celebrated with our annual Winter Cocktail Party which doubled as a great housewarming!  Last years theme focused more on silvery snowflakes but this year I decided to warm it up a bit.  I am obsessed with the look of gold confetti dots, they just scream glamorous party to me!  Check out my Pinterest board for this party and you'll see the trend.  So from the invites to the buffet table - everything had a healthy dose of confetti!


I'm also getting more into champagne and aside from a signature cocktail, we offered up mini individual sized champagnes for guests to grab up - encouraged by a lipstick message on the mirror.  Liquor bottles were available for mix-your-own and kept neat in a gold tray.  Garnishes were elevated and classy in martini and wine glassware.  They included white rock candy swizzles and gold rimming sugar for guests to sweeten up their cocktails.


This year's all white dessert display featured candies and cookies including candied grapefruit, white chocolate covered gummi bears and champagne bubble gumdrops!!  I upped the glitz by laying a long mirror on the dining table before parading out my display towers, mercury glass ornaments, winter scenes in cloches, traditional poppers, candles, and a sprinkling of 'snow' and hand punched confetti.


Photo Credit: my wonderful friend Joan Tsen of Applesky Photography

Happy Easter!

Enjoy your celebrations!!  As a hostess gift, I created a simple Easter centerpiece from a basket ($1!!), two pre-potted mini-daffodils, a cute green flocked bunny pick (that I thought looked like a mini topiary!) and some paper shreds to cover the pots!  After the holiday, the flowers are ready for replanting!

Bunny

Happy 4th of July!

A beautiful weekend with great friends and a few American classics...


Plus my favorite cocktail this summer: The Dark N' Stormy...
(1/2 can ginger beer, 1.5 oz. Dark Jamaican Rum, mix with ice & lime)

Have Yourself a Merry Little Cocktail

"Perhaps the best Yuletide decoration is being wreathed in smiles."~ Unknown
I love how this is the most festive time of the year! It seems like no one can resist adding a little sparkle to their homes - and themselves - sounds like the perfect reason to throw a cocktail party!! So I got to making some elaborte decorations, overstocking the bar, and cooking up too much food!

Decor

As soon as I walked into my new apartment with its double height living room ceilings I knew it was meant for a party! My sweet boyfriend agreed to the task of stringing up dozens of foam snowflakes at varying heights so they could cascade down over the guests. My collection of old Christmas cards came in handy and I selected my most favorites to hang from ribbons at intervals along an evergreen garland the length of the apartment. Sparkly gold and red ornaments and candles clustered together with (free!) evergreen scrap trimmings from the tree lot in glass jars placed throughout the apartment created a cozy glow!


Signature Cocktail

My friends and I love mojitos so why should they be just a summer drink?! I mixed up a batch (see recipe below) and poured it into martini glasses hooked up with mini candy canes and voila! Peppermint Winter Mojitos!


Simple Mojito Recipe:
  • Muddle together fresh mint leaves & lime slices with sugar in a tall pitcher
  • Add 1 parts Bacardi Rum and 2 parts Sprite
  • Stir in ice and pour through slotted spoon

Paper Party

"My own experience has been that the tools I need for my trade are paper, tobacco, food, and a little whisky." ~ William Faulkner

'Tis the Season for Holiday parties!! This past week, I felt as though my annual work party needed an extra festive touch... despite no budget and no time, its amazing what you can do with a pile of scrap paper, a lunch break, and enthusiastic coworkers!


Besides traditional snowflake cut outs, I did a quick internet search for paper crafts and found a few that could be whipped up in a snap... paper rosettes and paper ornaments. For the rosettes, cut two long rectangles, accordion fold them, and fold in half. Open up the accordion halves, making a fan and staple both fans together to form a whole circle. For the ornament, cut two long strips of paper, to medium length strips, and one short. Stack the strips together, long, medium, short, medium, long and staple the one end together. Bunch up the strips to align the other end and staple it as well. We had a lot of fun as we transformed the plain white scrap paper for a wintery look but you can use colorful paper such as wrapping paper scraps, magazine pages, etc. for any occasion that needs dressing up! Once they were all hung by rustic jute string, I added some white twinkle lights, and the company library was finally ready for a party!

*Rosette*


*Ornament*

Creepy Chic


Double, double toil and trouble; fire burn and cauldron bubble. - Shakespeare (Macbeth)
A good friend was planning to host a Halloween Party at a local bar and we were coming up with some simple yet festive ways to decorate the room. We didn't want the typical black and orange theme so we decided to go "Creepy Chic" as if the party were held in an abandoned, haunted bar. This would be easy to pull off with the bar's large windows, exposed brick walls and dim lighting. All we had to add was some stylish details and a healthy dose of cobwebs!

A fun project for the occasion was to create a pair of candelabras to flank the bar top itself. I started with large sheets of black foam core (make sure the core is black too!) and a stencil. To create the stencil: fold a large sheet of paper in half and draw half of a candelabra including the swirling arms, candles, and base. Cut the paper while still folded to create a perfectly symmetrical silhouette. Next, trace the stencil onto the black foam core and cut out with an x-acto blade or utility knife.

After cutting out each silhouette (my cat Herbert helped supervise!), measure halfway down and cut a slot the width of the foam core material. One silhouette will have a slot on the top half, and one will have a slot on the bottom half. Then, just slide them together and voila!

We brought the candelabras to the bar and set them up with cobwebs and creepy crawlies to complete the look! This is a great project for any occasion: use hot pink foam core and feather trimmings for a swanky birthday or bachelorette! Use silver or gold foam core and rhinestones accents for a glamorous bridal shower or New Year's Eve dinner party! For the really ambitious, enlarge the scale even more and create a hanging chandelier!

Happy Birthday America!

Ask not what your country can do for you; ask what you can do for your country. - John F. Kennedy
I hope everyone enjoyed their 4th of July weekend! It was the perfect weather to enjoy with friends and fireworks! My boyfriend and I decided to go against the traditional F.O.J. BBQ and host a deliciously lazy brunch instead! We had some friends down to our beach apartment and it made more sense to kick the day off with some grub rather than trying to lure everyone off the beach later! It worked out great and everyone slept it off in the sun and sand!
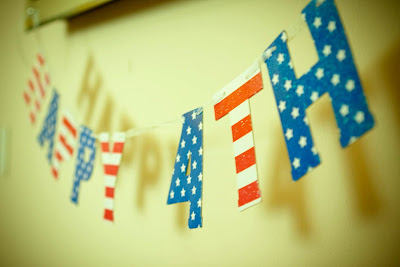

Even though we were hosting an indoor brunch, I still wanted the feel of an outdoor picnic. I chose easy breezy things like paper lanterns, a handmade banner, and wrapped red/white/blue ribbons around some candles. Since the meal was the focus, patriotic touches worked their way into the buffet table too... I used the same ribbon to tie up napkins around plasticware and piled them into a white summery basket. I found other fun things like stars and stripes muffin liners and little flag toothpicks!


To make the morning as simple (and lazy) as possible, the brunch was served buffet style and the menu was limited to two main dishes - one savory: Breakfast Burritos and one sweet: French Toast Bake! I prepared the French Toast Bake the night before and kept it in the fridge. In the morning, I threw the French Toast in the oven while my girlfriends and I cooked up scrambled eggs and burrito toppings, placing them all in seperate bowls for self-serve ease. Burrito toppings included crumbled sausage, diced ham steak, tomatos, potatoes o'brien, shredded cheese, and salsa.

My absoulte favorite morning cocktail is the infamous Bloody Mary! While the girls were busy in the kitchen, the boys set to task with whipping up the perfect batch. They were armed with V8, horseradish, celery seed, tobasco sauce, lemons, limes, salt, pepper, celery stalks, olives, and of course, vodka. After much "taste testing", they shared with the rest of us!

I ♥ Brunch

Christmas, my child, is love in action. Every time we love, every time we give, it's Christmas - Dale Evens
My girlfriends and I love love love brunch... but our schedules don't always work out to align with the moon, the stars and Sunday morning! So for our Christmas Girl's Night, they came over for a decadent meal of stuffed french toast and mimosas!


The table was set to reflect the festive occasion... A gathering of greenery, gold sprayed pine cones and candles at various heights created the simple centerpiece. The gold and red of the centerpiece was echoed by the tablecloth and napkins for a pretty backdrop for the feast to come! When all else fails, just dim the overheads and bask in the glow of the Christmas lights!


For the stuffed French Toast, I searched for a recipe that came close to the delicious treat we had all shared at a popular brunch spot in Philadelphia - but also easy to make! The one I found was from Rachel Ray and came out great! I didn't add the chocolate chips or make the syrup and instead just topped the stuffed french toast with a berry compote made from a bag of frozen mixed berries cooked down with some sugar. And I couldn't forget to finish the whole dish off with a light dusting of powdered sugar! For our cocktail, I made a twist on the traditional mimosa by adding pineapple juice to the orange juice and champagne. I also floated Cara Cara pink(!) oranges in it for extra color and flavor. Cheers and Merry Christmas!

Cornucopia With A Twist

"Heap high the board with plenteous cheer and gather to the feast, And toast the sturdy Pilgrim band whose courage never ceased."
- Alice W. Brotherton

Thanksgiving is a wonderful holiday filled with friends, family, and delicious food! In this spirit, what better table centerpiece than an edible one? Making a traditional cornucopia entirely of bread and using it as a serving dish is a great festive addition to the table - without taking away valuable real estate! A cornucopia or 'horn of plenty' goes back to Greek mythology but in modern times is most notably recognized as a symbol of the fall harvest's bounty. Instead of traditional fruits and vegetables, I recommend filling the cornucopia with the following:
~ An assortment of mini bread muffins such as cornbread, orange cranberry, pumpkin, etc. for everyone at the table to enjoy!
~ A savory dip that compliments the breadsticks. Prior to making the cornucopia, determine what bowl your dip will go in and create the opening size to match.
~ A variety of fancy cheeses and cured meats and crackers spilling out!

I found the following recipe for a bread cornucopia in a magazine years ago and its a classic that is both quick and fun to make. There are many different versions out there but I find this one to be the simplest. All you need is heavy-duty aluminum foil, 3 tube cans of refrigerated bread stick dough, and 1 egg.

1. Heat oven to 350°F. Lightly coat a baking sheet, at least 17 x 14 in., with nonstick spray.

2. To make form for Cornucopia: Tear off a 30 x 18-in. sheet of heavy-duty aluminum foil. Fold in half to 18 x 15 in. Roll diagonally to form a hollow cone about 18 in. long with a diameter of 5 to 6 in. at wide end. Fasten end with tape. Stuff cone with crumpled regular foil until form is rigid. Bend tail of cone up. Spray outside of cone with nonstick spray. Place on baking sheet.

3. Open and unroll 1 can of dough on work surface. Separate breadsticks. Gently roll with hands on work surface until breadsticks are about 18 in. long. Begin by wrapping 1 breadstick around tip of cone. Tuck end under, then press on another breadstick. Continue spiral-wrapping cone, slightly overlapping dough, until there are 6 breadsticks left.

4. Pinch 1 end of each of 3 breadsticks together, then braid, attaching remaining 3 breadsticks to first 3 by pressing ends together. Continue to braid. Brush bread around opening of Cornucopia with glaze. Gently press on braid. Brush entire Cornucopia with glaze: 1 egg beaten with 1 Tbsp water.

5. Bake 45 minutes or until bread is a rich brown. (If parts start to darken too much, cover them with foil.)

6. Remove from oven; let cool completely on baking sheet on a wire rack. Remove foil when cool. (If freezing, leave foil in bread for support. Remove when thawed.)

7. Fill Cornucopia directly on serving surface, letting contents spill out of the opening.